Start to finish, this purse took me a total of three naptimes (approx. 6 hours) to complete. Made for my big sister's birthday and named in her honor, this bag was entirely self-designed, planned, photographed, and created.
And here's how to make your own. (I sorta feel like a magician who's revealing his slight of hand...)
What You Need
1/2 yd. fabric (60 in. bolt) of outer fabric
1/2 yd. complimentary lining fabric
matching thread
medium weight interfacing
magnetic closure
Step 1
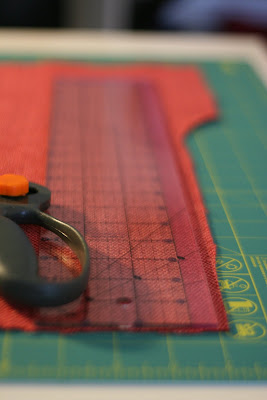
Beginning with your outer fabric, measure and cut the trapezoid (top length 10 1/4 ", sides 4", bottom 14 in.). 


Step 2
Fold, pin, and cut two at the same time.

Step 3
Turn your fabric sideways to draw the body of the purse. See photo for dimensions of the footed bowl shape.
(21.5 " across the top-- plenty of room for those fab. pleats!, 12" from top to bottom, the last 2" of which is the "foot" which later becomes the flat bottom and gives the bag a great shape, 18" across the bottom. Photo also shows where I began my curve-- about an inch and a half up from the foot section, the picture says 45 degrees, but obviously it's not a straight angle-- I freehand curved it there)
Step 4
Fold fabric, pin, and cut two at the same time.
Step 5 (optional)
Depending on your fabric choice, you may want to add a medium weight fusible interfacing to your outer fabric at this stage. My tweedy stuff was a little too slouchy, so I added some to give it more heft.
Step 6
Pin pleats so that the top of your body piece (21" wide) is now only 14 " wide (the length of the bottom of the trapezoid).
Step 7
Sew and attach the trapezoid piece to the body piece, right sides together. Pull pins out as you go.
Step 8
Lay out your lining fabric (folded in half) and set your outer fabric on top to use as a guide. Pin outer fabric (the"bag half") down, and cut around it-- again, two pieces cut at the same time.
Step 9
Grab the remainder of your outer fabric to make a pocket for the bag. This will end up in the interior, and make a nice spot for a cell phone and car keys. The remaining piece of the 1/2 yd. was the perfect size.
a) First, I just trimmed off the odd shape to make an even rectangle.
c) Pin in place with right sides together, and sew around three sides(up, over, down), leaving the bottom end open (selvedge in this case). 


g)Fold up and pin down again. Decide where (if) you want your pocket divided. I sewed a seam about 1/3 of the way over on the right for a cell phone, leaving a larger pocket for keys, lip balm, etc.
Step 10
Add the magnetic closure. Here's what they look like. I ordered mine online, but I know places like Jo-Ann carries them. Everything you need:
a) First, fuse some interfacing to the wrong side of the lining fabric where you expect the closure to go (remember to allow a little seam allowance at the top of the trapezoidal part, so down just a bit).
See, if they end up here, they'll meet perfectly.
c) Set the circular backing piece so the center hole lines up with your pinhole. With an ink pen, trace the two lines on either side.
d) Fold those little lines in half and clip them delicately with scissors.
Watch them kiss!
Step 11
To begin attaching the outer and lining fabrics, lie a lining piece up with an outer piece, being careful to put right sides together. Pin in place, and plan a turning gap so that when you've sewn this, you can turn it right side out and your seam will be hidden.
Here's mine sewn together, the pen is there to point out where I left my turning gap.
Step 12
Turn right side out and iron seams so they'll lie nicely.
Step 13
Next, line up the two halves with outer fabric together, lining fabric out. Pin in place, then sew them together.

Before you turn it right side out, make the great corners that give this bag the great shape.
Okay, the pin is pointing out the foot.
Pin in place. Use a measuring tape to be sure your seams are even-- don't want this to look lopsided. (I made each fold 3" long.)
Sew up the angled sides. When you turn it right side up, admire your work.... how nice, eh?
See how that bag has shape now, and wants to sit there looking cute?
Step 15
Add your handles. You can make your own out of the leftover fabric, but I chose to get these wooden ones at the store. I lucked out and the rose tone of the wood echoed the coral fabric.
Et voila! It's done!
Whew! Making a tutorial is almost as laborious as the bag itself!
Tuesday, March 24, 2009
Big Sister Bag Tutorial
Posted by Ruthie at 4:46 PM 11 comments
Subscribe to:
Comments (Atom)


